Share
Hey there, sweet friend! If you’ve landed here, I’m guessing you’re either curious about making homemade marshmallows or maybe you’ve tried before and things didn’t quite turn out as fluffy as you’d hoped. Trust me, I’ve been there!
After years of studying candy-making techniques and countless batches of marshmallows (some successful, some… well, let’s just say they became “learning experiences”), I’ve discovered the secrets to creating those pillowy-soft treats that’ll make everyone think you’re a confectionery wizard. And guess what? It’s way easier than you might think!
What Are Homemade Marshmallows, Really?
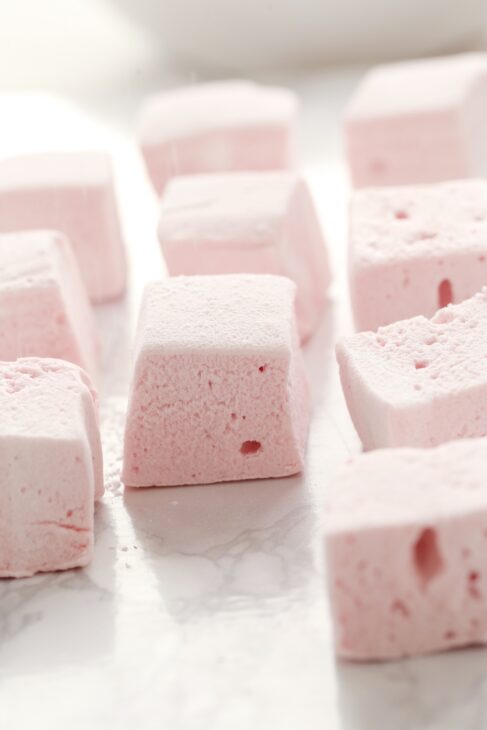
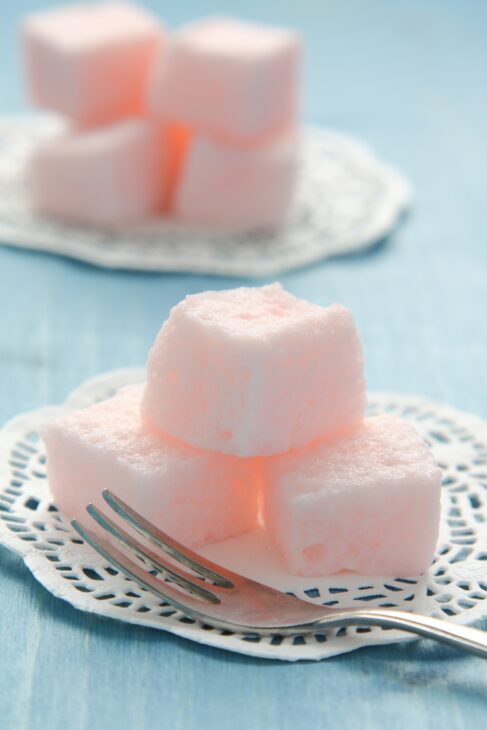
Okay, let’s get real for a second. Homemade marshmallows are nothing like those store-bought marshmallows you grab off the shelf. When you make them yourself, you’re creating these incredible, melt-in-your-mouth clouds of sweetness that are fresher, fluffier, and honestly, kind of addictive (consider yourself warned!).
At their core, marshmallows are basically sweetened gelatin that’s been whipped into submission – in the best way possible! The magic happens when you combine gelatin with hot sugar syrup and beat it until it transforms into this gorgeous, fluffy mixture that sets into the marshmallows we all know and love. But here’s the thing most recipes don’t tell you: the little details make ALL the difference.
Tools and Products You’ll Need (The Real MVPs)
Before we dive in, let’s talk tools. Through all my marshmallow adventures, I’ve learned that having the right equipment isn’t just helpful – it’s kind of essential for success. Don’t worry though, you probably have most of this stuff already!
Essential Tools:
- A stand mixer (your arm will thank you – trust me on this one!)
- A reliable candy thermometer (this is non-negotiable, friends)
- A sturdy 8×8 or 9×9 inch baking pan
- Parchment paper or a silicone baking mat
- A good rubber spatula (the kind that can handle thick mixtures)
- Kitchen scissors or a pizza cutter for cutting
Nice-to-Have Tools:
- Offset spatula for smoothing
- Pastry brush for applying oil
- Fine-mesh sieve for dusting

Ingredients (My Tried-and-True Recipe)
Here’s where I’m going to share something special with you. This recipe is slightly different from what you might find elsewhere, but stick with me – there’s method to my madness! These proportions create the perfect texture every single time:
- 1/3 tablespoons of gelatin (I know it seems like an odd amount, but it works!)
- ½ cup of warm water (for hydrating the gelatin)
- ¾ cup of sugar
- 1 cup of water (for the syrup)
- 1 tablespoon of vinegar (this is my secret weapon – it prevents crystallization!)
- Red food dye (or any color you love – we’re making these pretty!)
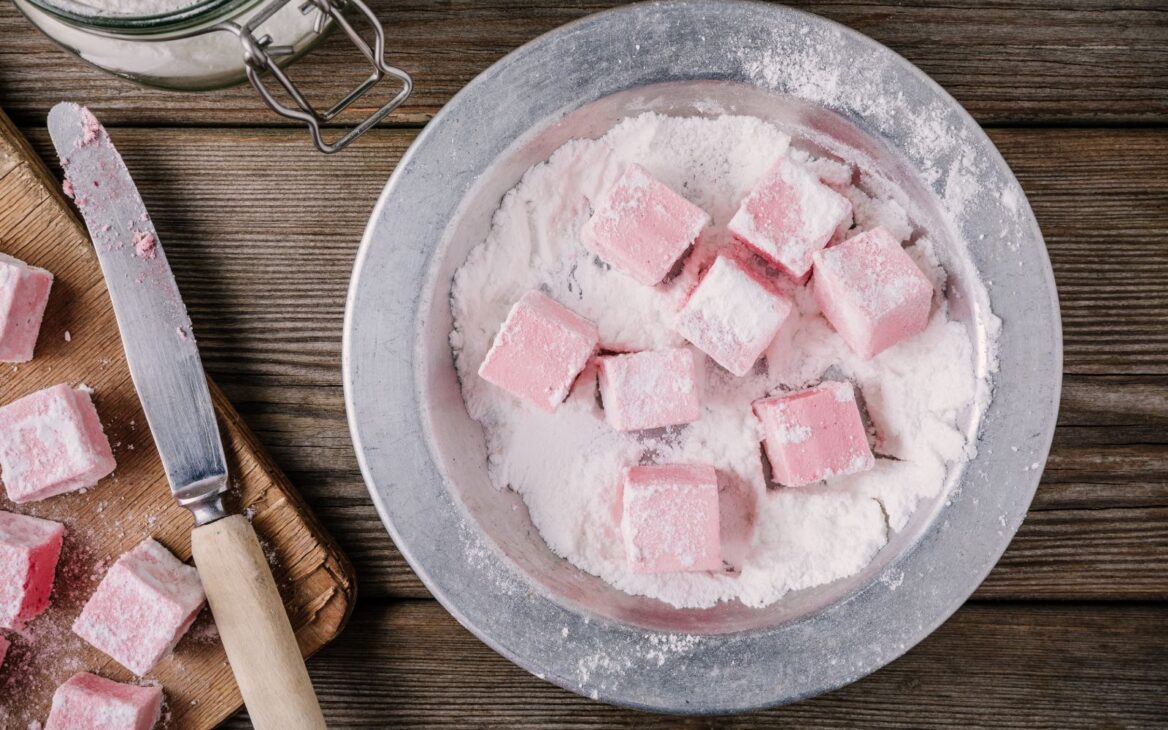
- Powdered sugar and cornstarch for dusting (equal parts)
Your Step-by-Step Guide to Marshmallow Success
Alright, friend, let’s do this! I’m going to walk you through every single step, including all those little tips I’ve learned along the way.
Step 1: Prep Your Pan (Don’t Skip This!)
First things first – line your pan with parchment paper and give it a good coating of cooking spray. Then dust it with your powdered sugar/cornstarch mixture. This might seem like overkill, but trust me, nothing’s worse than perfect marshmallows that won’t come out of the pan!
Step 2: Bloom That Gelatin
In your mixer bowl, combine the gelatin with ½ cup of warm water. Give it a gentle stir and let it sit. It’ll look kind of gross and lumpy – that’s totally normal! This process is called “blooming,” and it’s crucial for smooth marshmallows.
Step 3: Make Your Syrup (Here’s Where the Magic Happens)
In a medium saucepan, combine your sugar, 1 cup of water, and that tablespoon of vinegar. Here’s my pro tip: don’t stir it once it starts boiling! Just let it do its thing. Heat it to exactly 240°F (soft-ball stage). This temperature is super important – too low and your marshmallows won’t set, too high and they’ll be tough.
Step 4: The Transformation
With your mixer on low speed, slowly pour the hot syrup into the bloomed gelatin. Once it’s all in, crank that mixer up to high and let it work its magic for about 10-12 minutes. You’ll know it’s ready when the mixture is thick, fluffy, and barely warm to the touch.
Step 5: Add Your Color
During the last minute of mixing, add a few drops of your red food dye. Start with less than you think you need – you can always add more!
Step 6: Work Quickly But Don’t Panic
Pour the mixture into your prepared pan. It’ll be sticky, but that’s what the greased spatula is for! Smooth the top as best you can (it doesn’t have to be perfect – homemade charm, remember?).
Step 7: The Waiting Game
Let your marshmallows set for at least 4 hours, but overnight is even better. I know waiting is hard, but good things come to those who wait!
Step 8: Cut and Dust
Once set, lift the whole thing out using the parchment paper. Dust your kitchen scissors with the sugar mixture and cut into squares. Toss each piece in more of the dusting mixture.
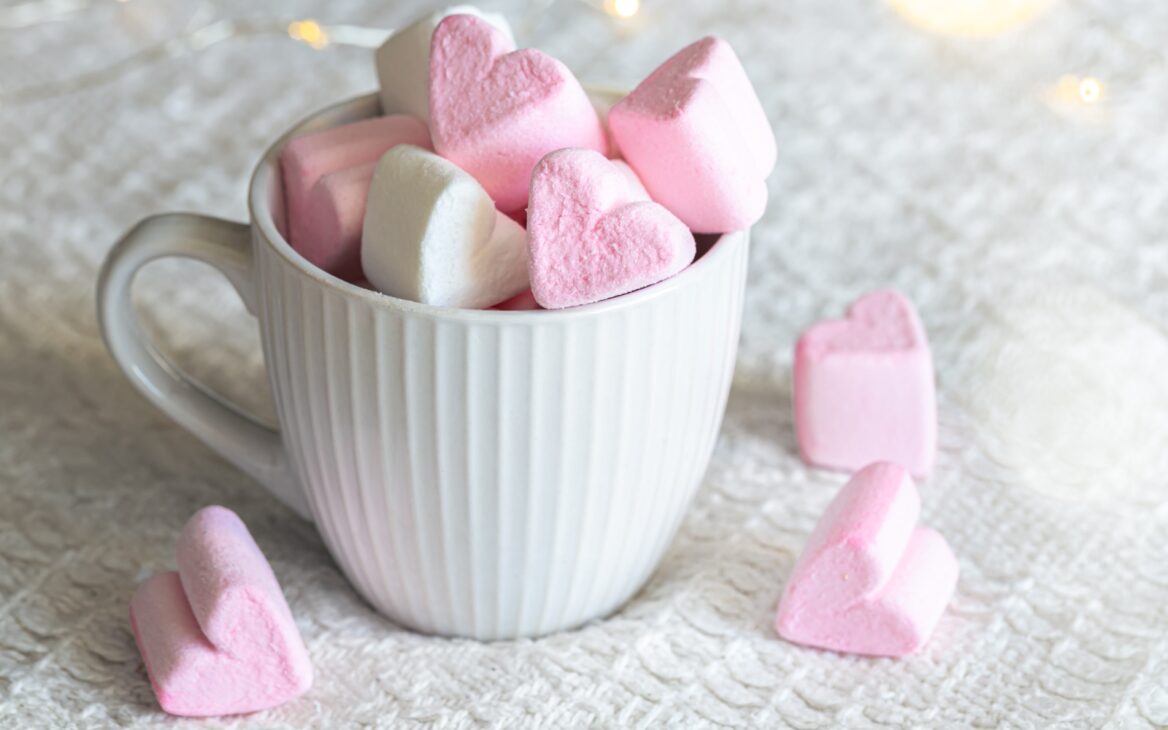
Different Types and Variations You Can Try
Once you’ve mastered the basic recipe, the fun really begins! Here are some variations I’ve experimented with:
Flavor Adventures:
- Add vanilla extract or almond extract for classic flavors
- Swirl in cocoa powder for chocolate marshmallows
- Try peppermint extract for holiday treats
- Add freeze-dried fruit powder for fruity versions
Fun Shapes:
- Use cookie cutters for themed shapes
- Pipe them using a pastry bag for mini marshmallows
- Make marshmallow ropes and cut them into pieces
Common Mistakes (And How to Avoid Them)
Let me save you from some of the mistakes I made when I was learning:
- Mistake #1: Wrong Temperature If your syrup isn’t hot enough, your marshmallows will be sticky forever. Too hot? They’ll be tough. That candy thermometer is your best friend here.
- Mistake #2: Not Enough Mixing It might seem like 10-12 minutes is excessive, but that whipping time is what creates the fluffy texture. Don’t rush it!
- Mistake #3: Humid Weather Marshmallows and humidity are not friends. If it’s super humid, they might stay sticky. Try making them on a drier day, or add a bit more gelatin.
- Mistake #4: Impatience with Setting I get it – you want to try them NOW. But cutting too early will give you a sticky mess. Be patient, my friend!
Storage and Longevity Tips
Here’s the beautiful thing about homemade marshmallows – they last way longer than you’d think! Store them in an airtight container with parchment paper between layers. They’ll stay fresh for up to 3 weeks at room temperature.
Pro tip: Don’t store them in the fridge! The moisture will make them weepy and sad. Nobody wants sad marshmallows.
For longer storage, you can actually freeze them! Just make sure they’re well-wrapped and separated. They’ll keep for up to 3 months.
You’ve Got This!
Listen, I know making marshmallows from scratch might seem intimidating at first. But here’s what I want you to remember: every expert was once a beginner. The first time I made marshmallows, they were so sticky I practically glued my hands together! But each batch taught me something new, and now I get to share all those lessons with you.
The beauty of homemade marshmallows isn’t just in how much better they taste (though they really, really do). It’s in that moment when you pull out a tray of perfect, fluffy squares and realize YOU made those. It’s in the joy on people’s faces when they taste them. It’s in knowing exactly what went into your treats.
So grab those ingredients, channel your inner candy maker, and give it a try! And hey, if your first batch isn’t perfect? That’s okay! Even “imperfect” homemade marshmallows taste better than store-bought, and each attempt makes you better.
I’d absolutely love to hear about your marshmallow adventures! Did you try any fun flavors? Did you nail it on your first try, or did you have some learning moments like I did? Drop a comment below and let’s chat about it. There’s nothing I love more than connecting with fellow marshmallow enthusiasts and hearing about your kitchen victories (and even the not-so-victorious moments – we’ve all been there!).
Happy marshmallow making, sweet friends! 🍬
Share