Okay, so mermaid curls are having a major moment right now, and honestly? I’m totally here for it. There’s something so dreamy about those loose, beachy waves that just makes you look effortlessly put-together. But here’s the thing – achieving them isn’t always as effortless as they look!

I’ve been diving deep into hair styling for years now, and mermaid curls keep coming up as one of those styles everyone wants but feels intimidated by. So I’ve made it my mission to figure out exactly what works, what doesn’t, and how to make this whole process way less overwhelming for you.

Trust me, once you get the hang of it, you’ll wonder why you ever thought mermaid curls were complicated. Let me walk you through everything I’ve learned.

So What Are Mermaid Curls Anyway?

Look, mermaid curls aren’t just some fancy name someone made up for regular curls. There’s actually a method to the madness here. Think of those gorgeous, flowing waves you see in beach vacation photos – that’s what we’re going for.

The whole vibe is about looking like you spent the day by the ocean, but without the salt damage or the unpredictable weather. These mermaid curls have this beautiful, organic movement that’s totally different from those super-structured curls from the early 2000s.

What makes them special? Well, they’re intentionally imperfect. Some waves curve one way, others go the opposite direction. Different sizes, different textures – it all comes together to create this really natural, lived-in look that’s just… chef’s kiss.

Mermaid Curls

The Tools You Actually Need (No Need to Break the Bank)

Let’s Talk Curling Irons

Here’s what I’ve discovered works best: a 1.5-inch barrel curling iron is pretty much your golden ticket. Not too big, not too small – just right for those flowing waves we’re after.

Now, do you need to spend a fortune? Absolutely not. I’ve seen amazing results with a basic drugstore curling wand too. Sometimes it’s really just about knowing how to use what you’ve got.

The heat thing though – that’s where people mess up. Fine hair? Keep it around 275-300°F. Thick hair? You can bump it up to 350-375°F. Your hair will thank you for not frying it, and your curls will actually last longer.

Heat Protection – Seriously, Don’t Skip This

I know, I know. Another product to add to your routine. But heat protectant spray is one of those non-negotiables that’ll save your hair in the long run.

Think about it this way – you wouldn’t lie in the sun without sunscreen, right? Same logic applies here. Plus, it actually helps your curls hold better, so it’s a win-win.

The Products That Make the Magic Happen

Sea salt spray – this stuff is pure gold for mermaid curls. It gives you that perfect beachy texture without making your hair feel crunchy or weird. I always keep a bottle handy.

Volumizing mousse is another game-changer, especially if your hair tends to fall flat. Just don’t go crazy with it – a little goes a long way. Nobody wants helmet hair, you know?

Here’s How I Do It (Step by Step)

Getting Started Right

Clean, dry hair is your starting point. I usually wash my hair the night before if I’m planning to do mermaid curls the next day. There’s something about that texture that just works better.

When you’re blow-drying, try using a round brush to get some volume at the roots. Can’t manage the brush-and-dryer coordination? No worries – just flip your head upside down while drying. Works almost as well and way less frustrating.

Mermaid Curls

Section It Out (This Part’s Important)

Okay, this is where a lot of people get lazy, but proper sectioning really does make a difference. Split your hair horizontally – top half, bottom half. Then divide each section into 2-3 vertical parts.

I know it seems like extra work, but trust me on this. You’ll get way more even results, and you won’t have to redo sections because you missed spots.

The Actual Curling Part

Alright, here’s where the magic happens. Take your section and wrap it around the barrel, but start about 2 inches down from your roots. This gives you a more natural look instead of that obvious “I just curled my hair” vibe.

Now here’s the secret – alternate your curl directions. One section away from your face, next one toward your face. Keep switching it up. This is what creates that random, beachy movement we’re going for.

Hold each section for about 8-12 seconds, depending on your hair thickness. Fine hair needs less time, thick hair needs more. Pretty straightforward.

The Waiting Game (Don’t Touch!)

This is probably the hardest part because we’re all impatient. But let those curls cool down completely before you do anything to them. Seriously. Go do your makeup, pick out your outfit, whatever – just don’t touch your hair.

Once they’re cool, gently run your fingers through to soften everything up. Then scrunch in some sea salt spray for that perfect imperfect texture.

Mermaid Curls

Different Hair, Different Approach

Fine Hair Tips

Lower heat is your friend here. Work with smaller sections, and definitely use some dry shampoo before you start curling – it gives your hair something to grip onto.

Volumizing products at the roots will help create the illusion of thicker hair too.

Thick Hair Strategy

You’ll need more heat and way more patience. I usually section thick hair into at least 6 parts because there’s just so much to work with.

Silk scrunchies are totally worth it for sleeping, and don’t be shy about using stronger hold products. Your hair can handle it.

Already Have Curls?

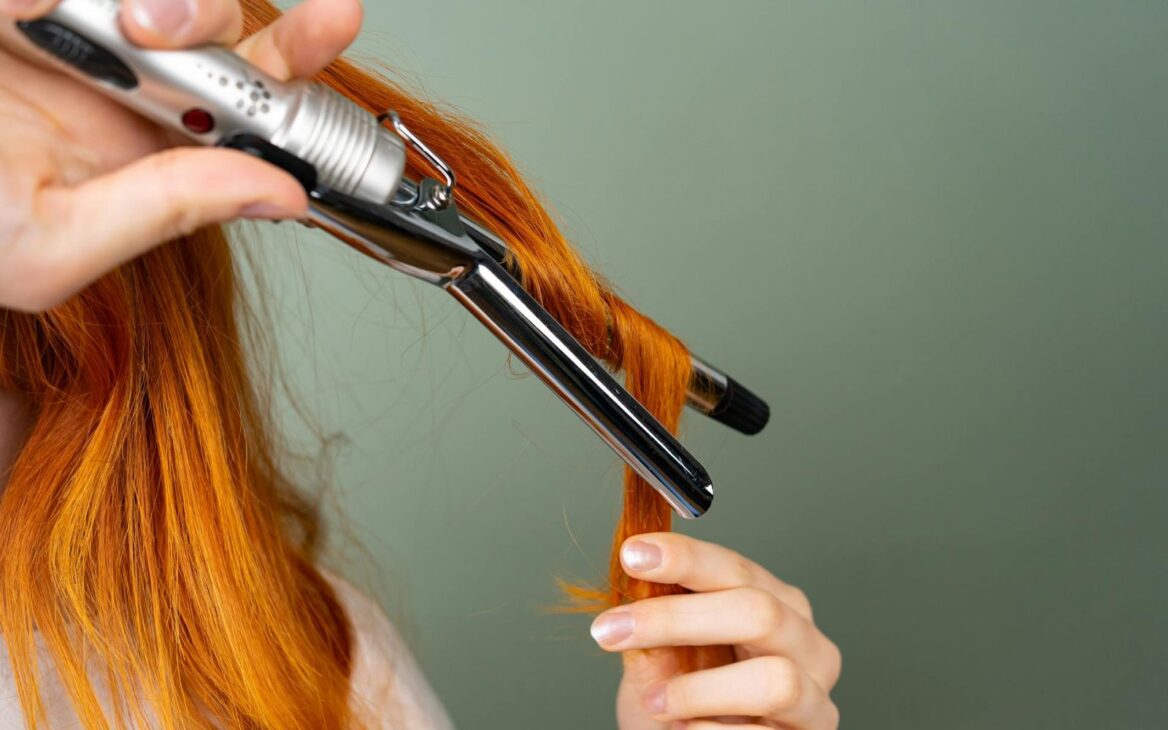
Lucky you! You can probably just enhance what you’ve already got. Use a diffuser when drying, then touch up a few sections with the curling iron to get everything going in the right direction.

Don’t Make These Mistakes

Using too much product is mistake number one. Mermaid curls should look effortless, not weighed down with gunk. Start small, add more if you need it.

Wrong barrel size trips people up too. Match your barrel to your hair length, not the other way around.

But the biggest mistake? Messing with your curls while they’re still warm. I get it, you want to see how they look, but patience pays off here.

Making Them Last

Sleep with your hair in the loosest possible bun – I’m talking barely-holding-together loose. Silk scrunchies and a silk pillowcase are both worth the investment.

Day two? Mist with some water mixed with sea salt spray, scrunch gently, and you’re good to go. Sometimes day-two hair looks even better than day-one.

Bottom Line

Look, mermaid curls aren’t rocket science, but there is a technique to it. The good news is that once you figure out what works for your hair, it becomes pretty routine.

Give yourself some grace while you’re learning. Even professional stylists had to practice this stuff. And remember – the whole point of mermaid curls is that imperfect, natural look, so don’t stress about making them perfect.

Start on a day when you’ve got time to experiment and nowhere important to be. That takes the pressure off, and you might surprise yourself with how well you do.

Most importantly, have fun with it! Hair grows, styles wash out, and there’s always tomorrow to try again. Your mermaid curls don’t need to look like someone else’s – they just need to look like you, but with amazing hair.

Now go give it a try! And if it doesn’t work out perfectly the first time, well… that’s what cute messy buns are for, right?

Hey there! If this guide helped you nail those mermaid curls, I’d love to hear about it! Drop a comment and let me know how it went – the good, the bad, and everything in between. Your feedback helps me figure out what’s working and what I should explain better.

If you found this helpful, I’d be thrilled if you followed me on social! I’m always sharing new techniques and honest product reviews to make your beauty routine easier.✨

What’s the hair technique you’re dying to master next? Always looking for new topics to dive into and break down for you!

What do you think?

Your email address will not be published. Required fields are marked *

No Comments Yet.